AGR Rock Ram
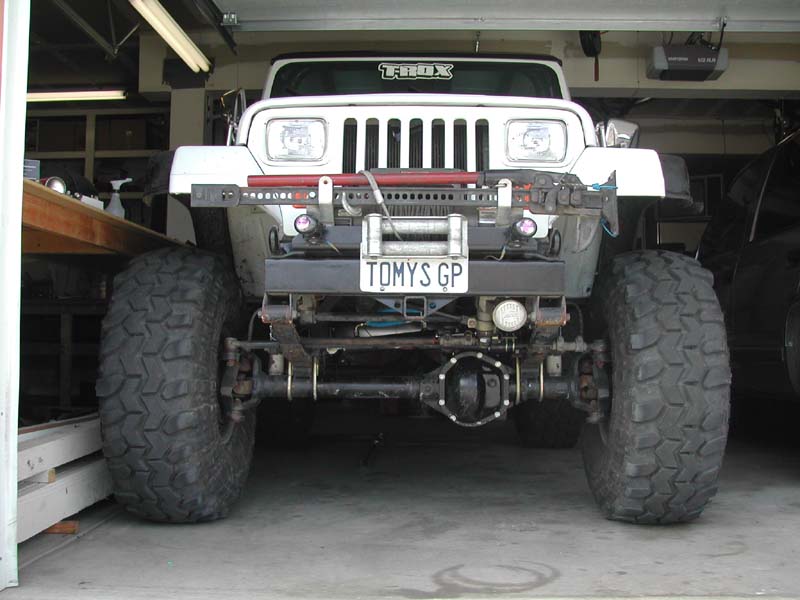
After changing from 35" x 12.5" SSR tires to 38.5" x 14.5" SX's my steering was seriously starting to suffer. A friend had a brand new AGR Rock Ram still in the box he was willing to part with real cheap. I took him up on the offer
1/03/2002 - Received the Rock Ram
Quinn dropped off the Rock Ram today. It's still missing a heim joint,
but he said that AGR was sending him a new one and it should be here any day.
1/5/2002 - Installation begins
We started the day by going to Ace Hardware to pick up a cheap heim joint.
I'll switch it out for the one from AGR when it arrives. I searched the internet for installation instructions and couldn't find
any. Eric and I decided just to go for it anyway and see what we get
done. Worse case, we get stuck and I have instructions faxed to me on
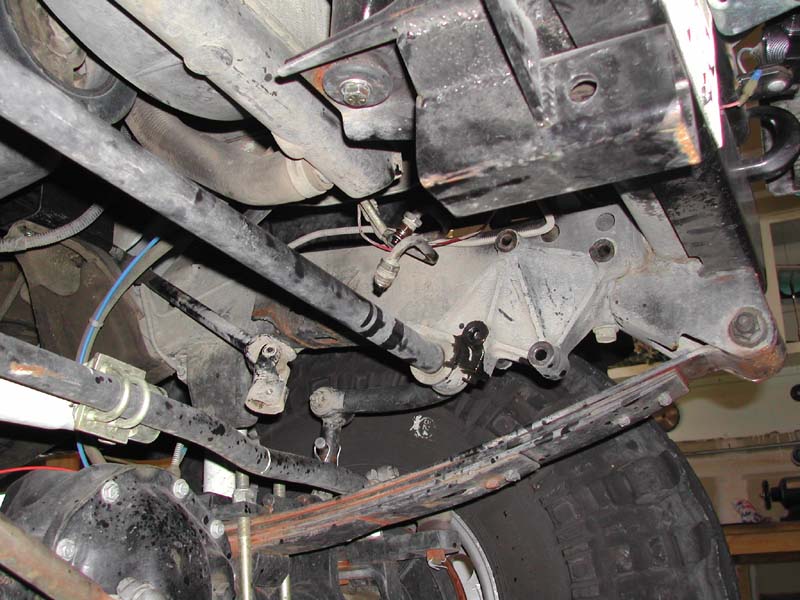
Monday. We started by pulling off the old steering box. Here's a pic of
the frame without the steering box and another
comparing the old and new. I took advantage of
the time I had the pitman arm removed to measure and duplicate the tapered hole
on my spare pitman arm. This way I can carry it for a spare. My drag
link ball joint is a larger one than a stock Wrangler, so the tapered hole is
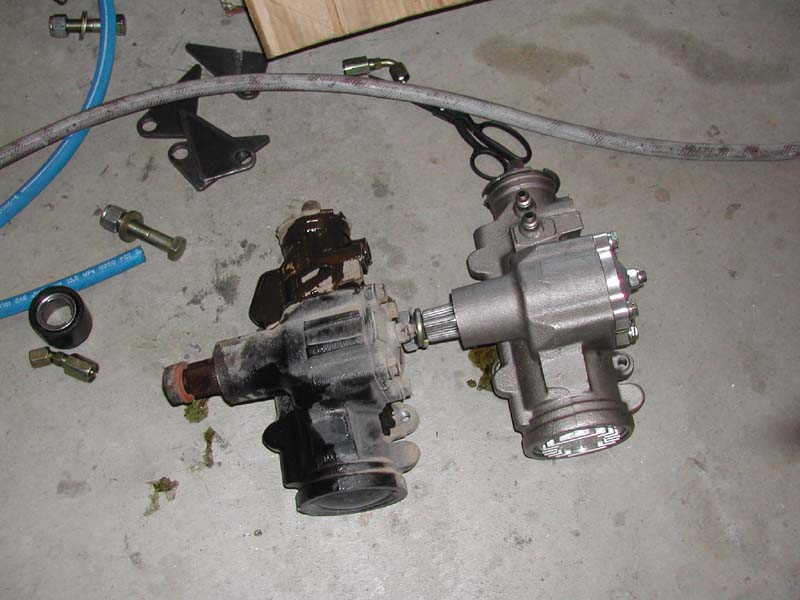
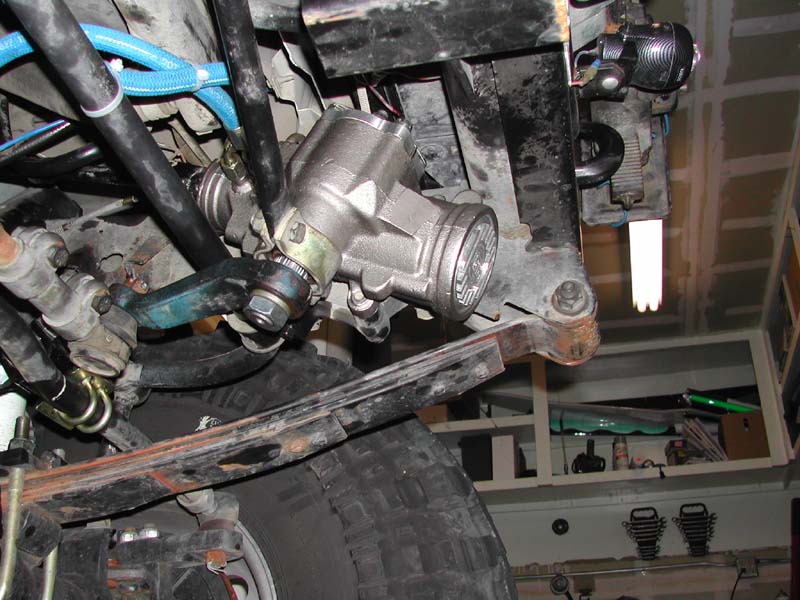
larger. Next we removed the pump.
Old
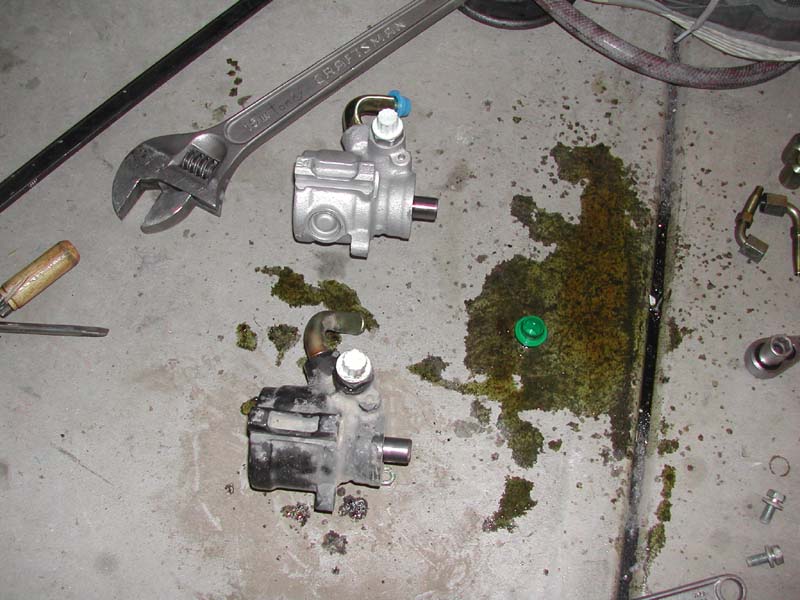
and new comparison. We pulled the pulley off the old pump with a
3-legged puller. The only way we had to install the pulley on the new pump
was with the vise. I don't think we supported the back of the well enough
because the main shaft was pushed back and broke the back of the aluminum
case. We used JB Weld to put the piece
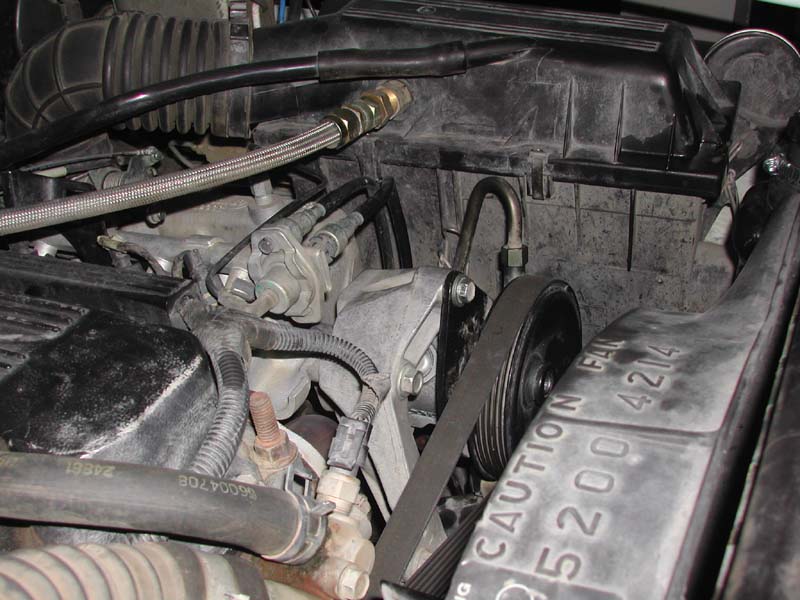
back on. Next we installed the new pump.
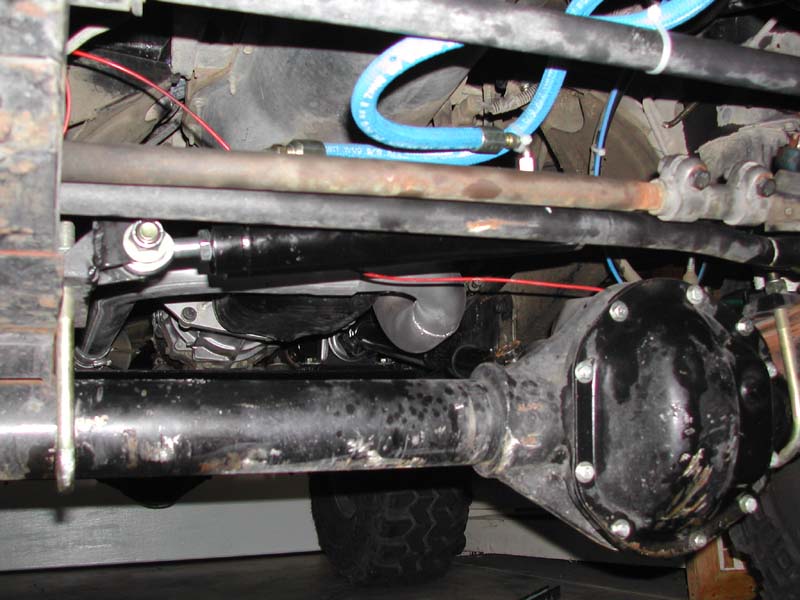
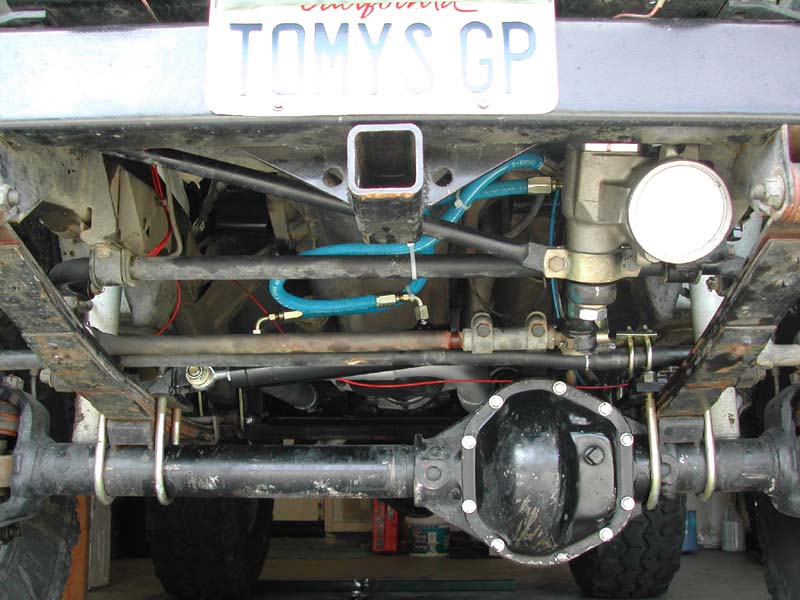
For the Rock Ram cylinder itself, we looked at various was to mount
it. We decided on the same location as the steering stabilizer.
This way the cylinder will help keep the wheels straight when cruising down
rutted or washed out roads. If we mounted the ram between the drag link
and frame, it might introduce bumpsteer and it would definitely put more stress
on the drag link and drag link ball joints. With it mounted on the
connecting arm, the only joints between the ram and the wheels are the
connecting arm ball joints, which obviously can't be avoided. Here's a few
shots of the Ram and plumbing. Pic1,
Pic2
& Pic3. We wanted to let the JB Weld cure
as long as possible, so we opted not to pour in the new power steering fluid.
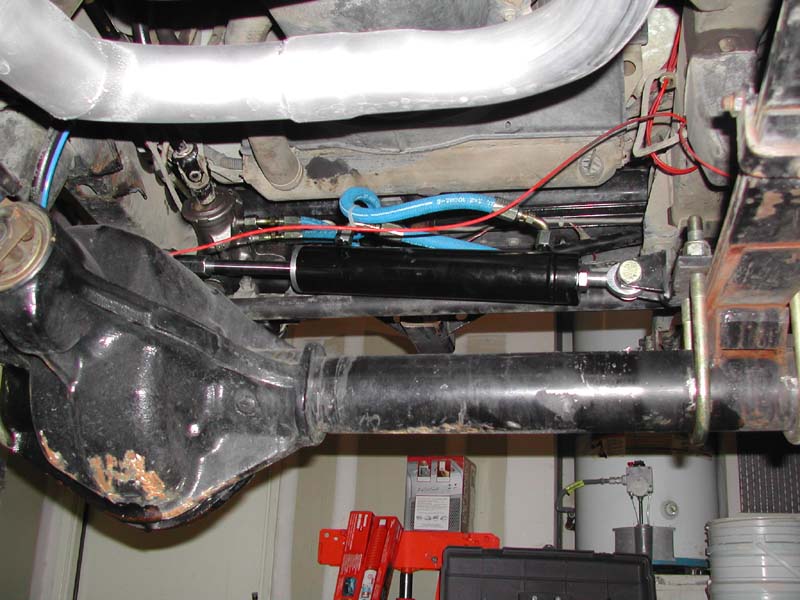
1/6/2002 - Finished installation, Test drive
This morning I poured in 32oz of power steering fluid. It wasn't
enough. I went to the store and bought 2 more 32 oz bottles. I
figured I got the hoses backwards on the Rock Ram cylinder and I was going to
have to break the system open to switch them. After topping off the fluid,
I removed the ball joint connecting the drag link to the pitman arm. This
was so I can test how the cylinder would behave if I broke a drag link or pitman
arm. Also, I could test the direction of travel and verify I have the
hoses correct. I did have them correct which was a good surprise.
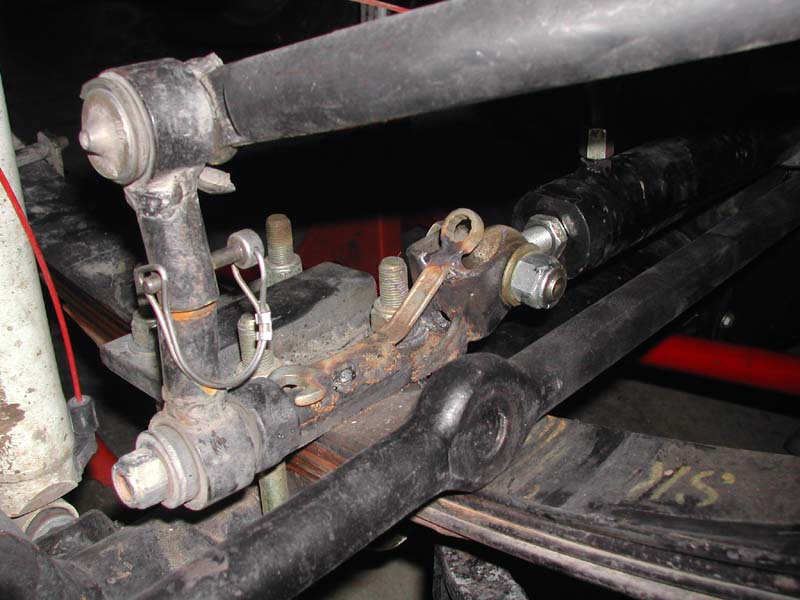
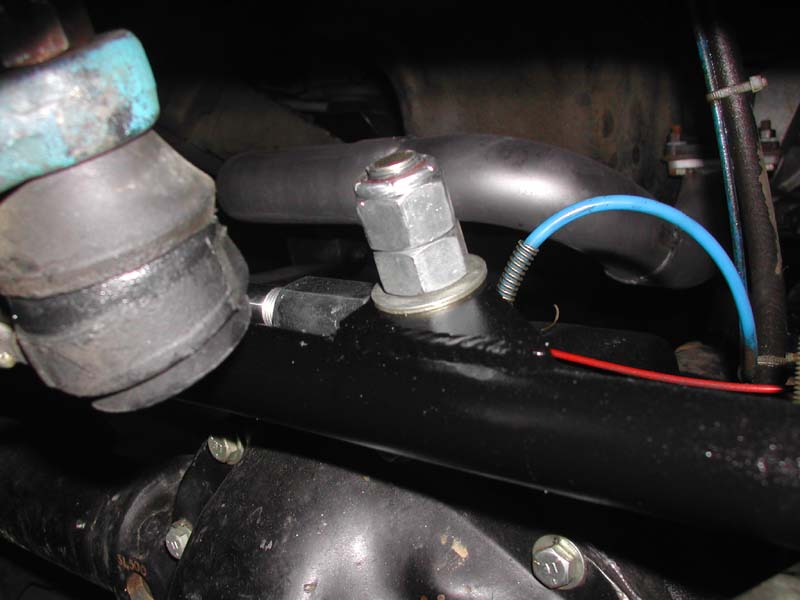
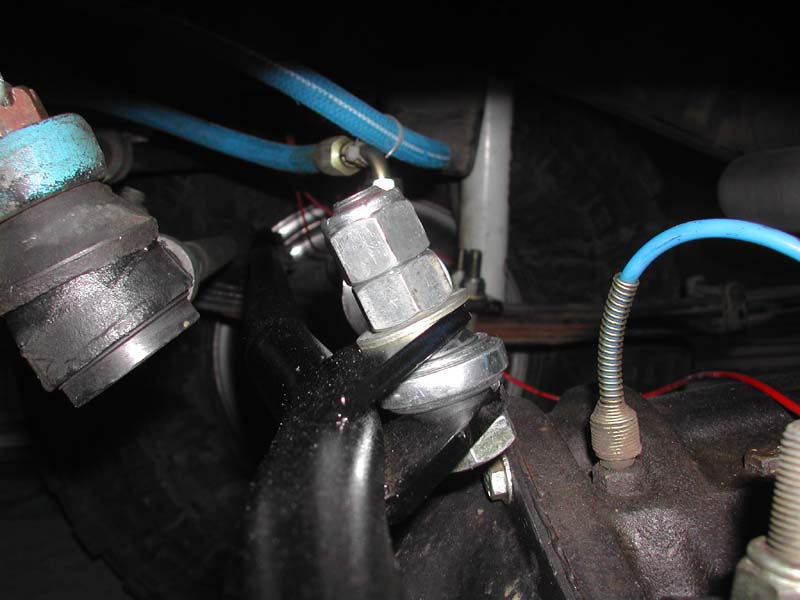
But the cylinder was so powerful that it bent my steering stabilizer
mount. Pic1 & Pic2
(the bend in the connecting arm is supposed to be there. It gives more
clearance for the pitman arm ball joint). This was half expected. To
fix it, I turned the wheels the other direction to bend the bracket back
down. Then I welded the bracket to the connecting arm to give it more
support. Here's two more pictures of the finished work. Pic1
& Pic2.
On the test drive I immediately noticed that the slop I had in the steering was gone. The Rock Ram system steers a little stiffer than before, but you can tell there's a lot of power. I placed the drivers side front tire parallel to a curb and turned the steering wheel. It turned with ease and actually moved the front of the Jeep over away from the curb a little. I also drove about a block away to a dirt area and went cruising down a bumpy section of road/trail. The steering was very responsive and felt good. The wheel doesn't shake around very much at all. When driving down a higher speed paved road, the steering wheel seems harder to turn, but when you give it input, it turns with plenty of assist.
1/12/2002 - Broke mount, bent connecting arm in Johnson
Valley
My Rock Ram mounts were not quite up to par. While running Sunbonnet Pass
with the Currie family at the Extreme4x4.com event, I broke the u-bolt mounting
bracket for the Rock Ram. This was not a big surprise since the mount was
kind of small. Also, sometime during the day, the Rock Ram must have
been pushing on the connecting arm when I bumped the connecting arm on a
rock. The connecting was bent up about 5 inches in the middle. Part
of the reason for this was that the Rock Ram was not parallel with the
connecting arm. It was at a little bit of an up angle. Also, the
mount on the connecting arm placed the heim joint too far away and gave it too
much leverage to bend the arm.
I fixed the u-bolt mount on the trail by grinding the original bracket and u-bolt and welding them back together. I also welded on a 1/2" wrench to give the original bracket more support. This worked for the rest of the trail! :) I didn't bother to attempt a fix on the bent connecting arm since it wasn't all that bad.
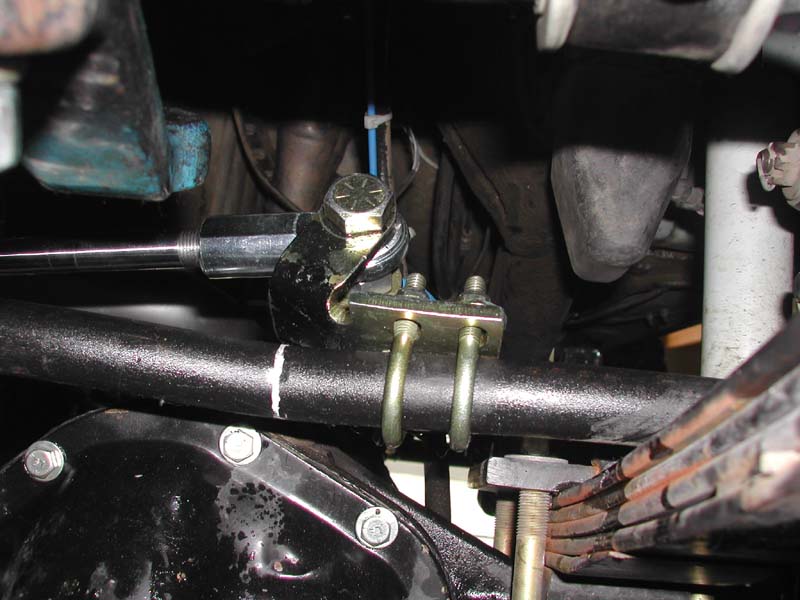
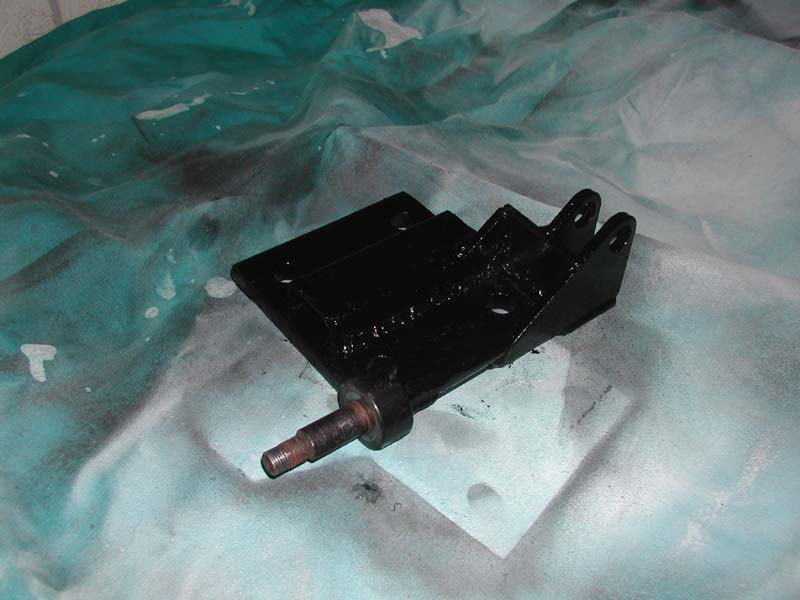
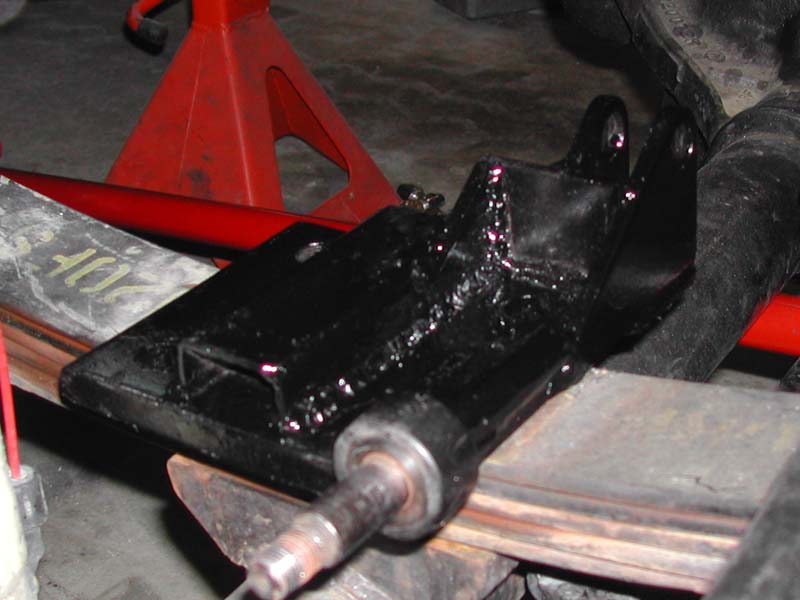
1/13/2002 - U-bolt plate fix, connecting arm fix
Today I repaired the u-bolt plate Rock Ram mount by cutting off the old mount
with 1/2" wrench trail fix and welding on a new 3/16" plate
bracket. I'm pretty sure this mount can stand up the the Rock Ram
pressure. Here's a picture of the new mount after
painting, sitting in it's location and after
installation.
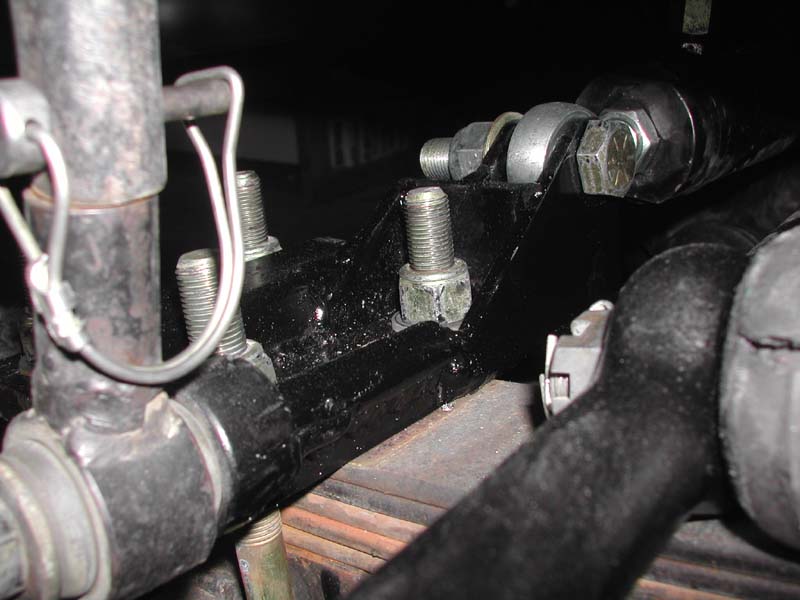
Next I went to work on the connecting arm. I straightened it as best I could, then I made a mount that placed the Rock Ram at a better angle and placed the heim joint very close to the connecting arm. Pic1, Pic2 & Pic3 The double nut is temporary until I get a shorter bolt.